


.png?w=100&itok=hKuNtBOw)


.png?w=100&itok=Md9-7E8t)


%20(2).png?w=100&itok=fEHREjki)
_ANZ-Group-shot_v2.png?w=100&itok=Z_Qi2FlQ)
_ANZ-Group-shot.png?w=100&itok=k25pq8iJ)
_ANZ-Group-shots.png?w=100&itok=v6A67Pxg)


Drill into timber, soft metal and hard materials including brick and concrete with the RYOBI 18V ONE+ Hammer Drill.
Tired of putting away your chopping board only to need it again five minutes later? Create a custom-made counter edge board that doubles as a stylish statement piece on your countertop.
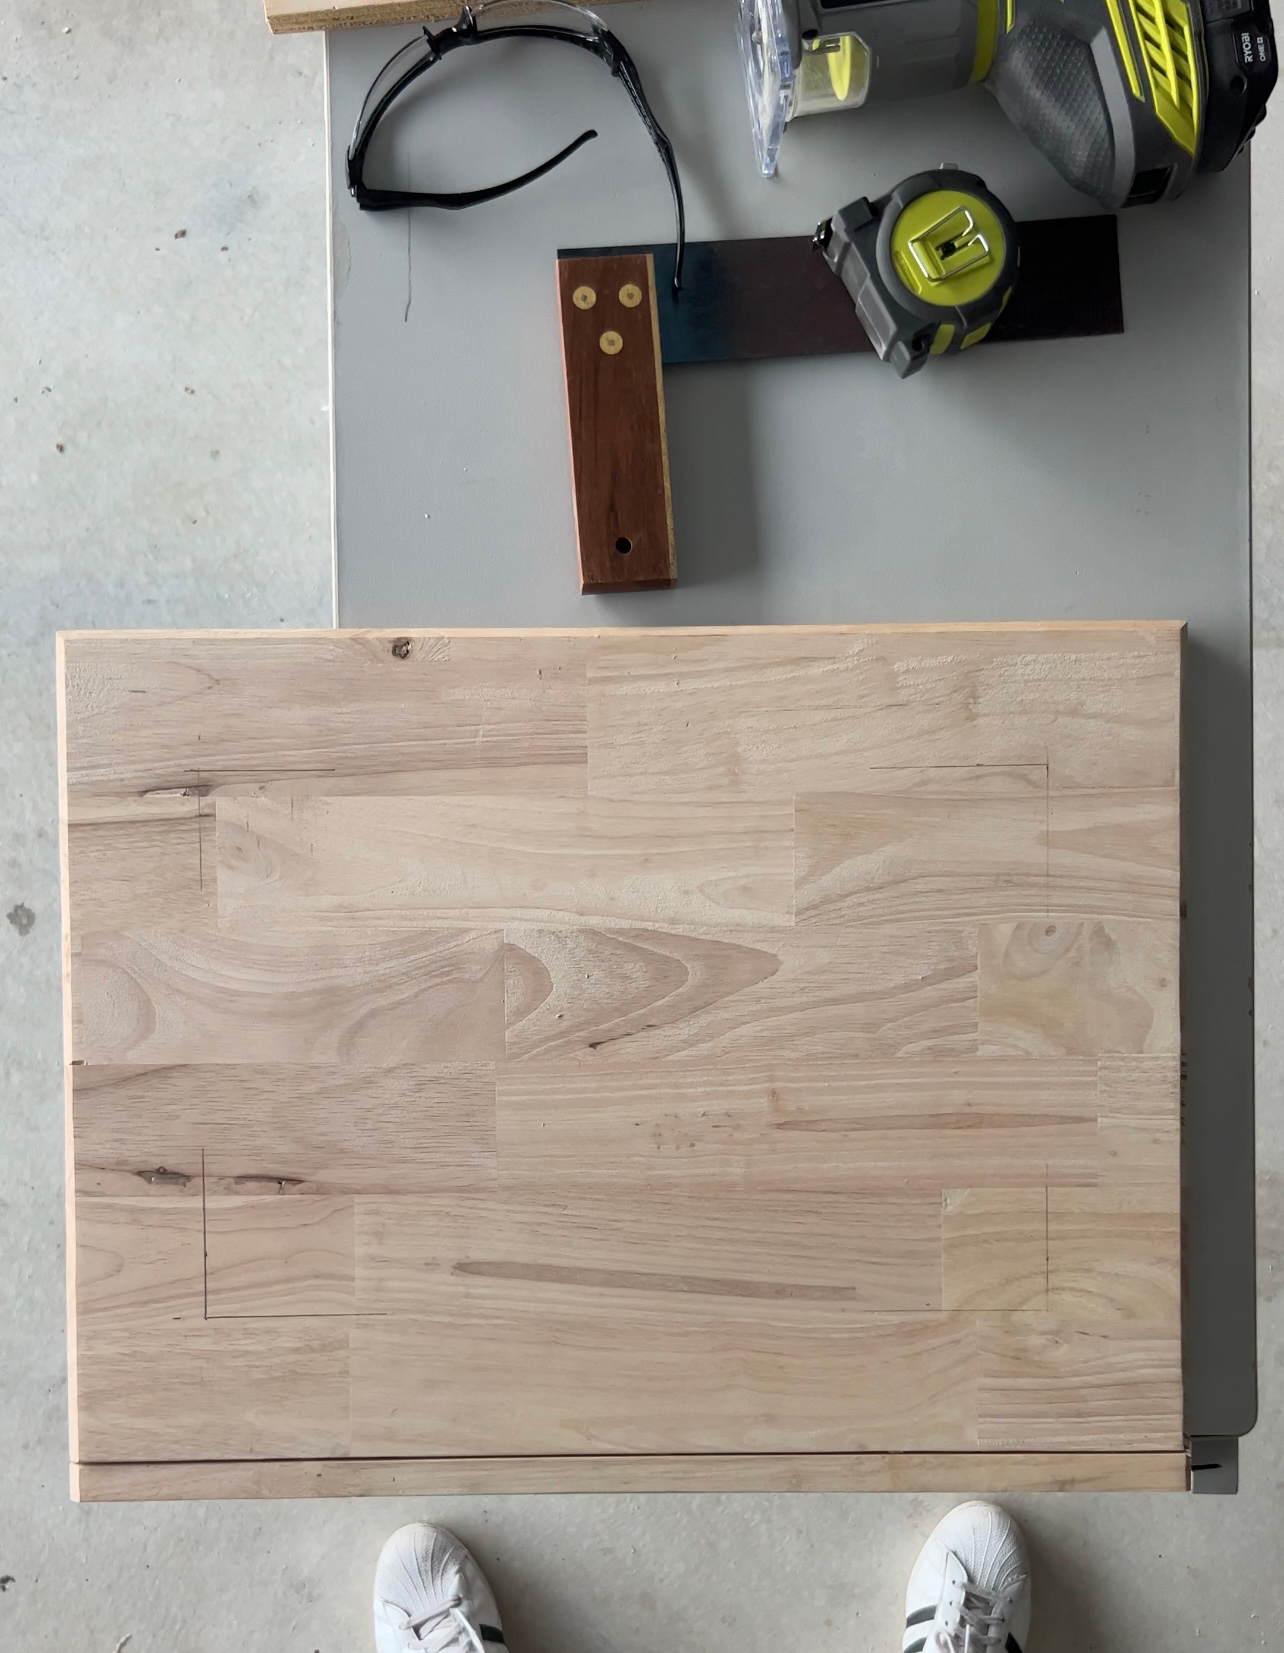
To begin this project, you will need a slab of wood - the beauty of this project is that you can customise the length of the board to suit your kitchen. Cut your board to 550mm x 450mm and then the lip that sits over the bench top to 550mm x 40mm wide .
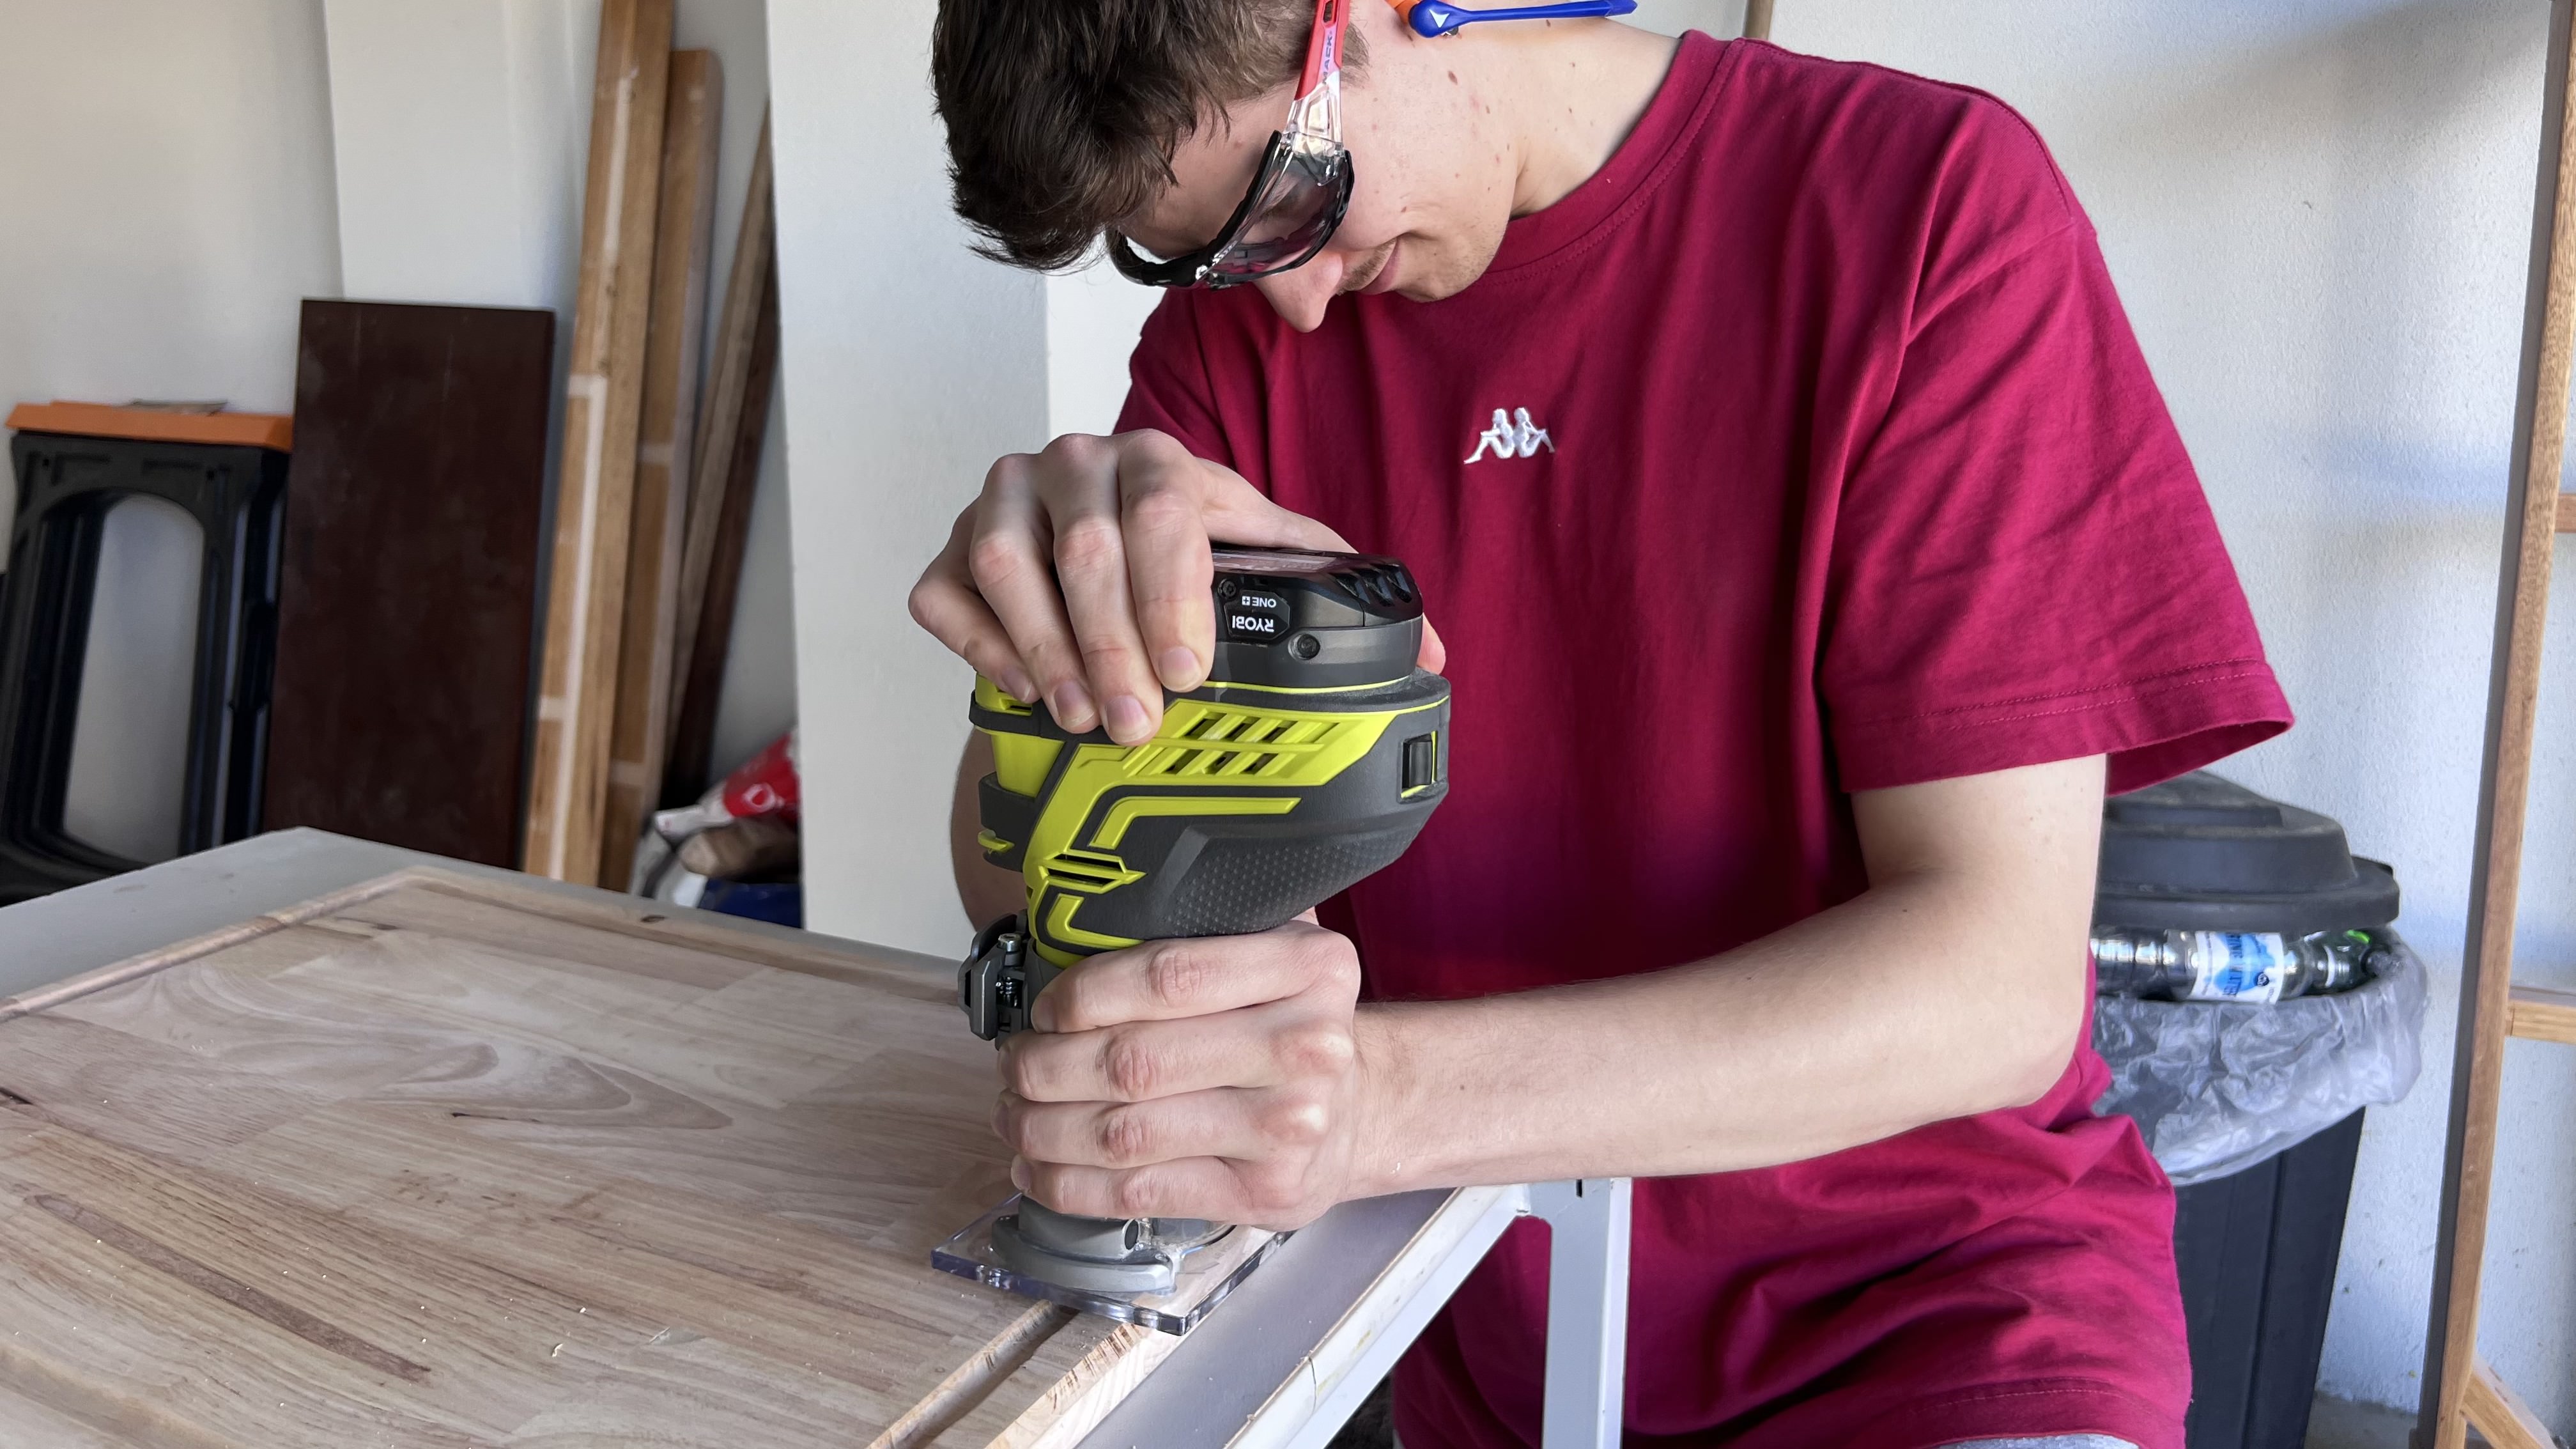
We now have our two pieces to make up the board. Use the trim router to chamfer the edges of the board. Insert the chamfer bit into the router and practice on a scrap piece of wood to get the desired chamfer size, keep adjusting until satisfied.
Mark a border 40mm from the outside edge of the board, to create a line for the router to follow. Once finished, clamp a straight piece of wood to the line, now the router will create a nice finish. Router the edge of 3 sides (not the side where the lip meets). Also chamfer the lip piece.
Next, router a small inside border. Use a cove bit and test it on scrap wood to see how deep you would like it. Mark 75mm on every edge from the outside to inside edge and create a line for the router to follow. Put a flat piece of wood on the line and clamp it down before routing. Stop before the end of the mark and turn the wood 90o to the next line. Repeat until all edges meet.
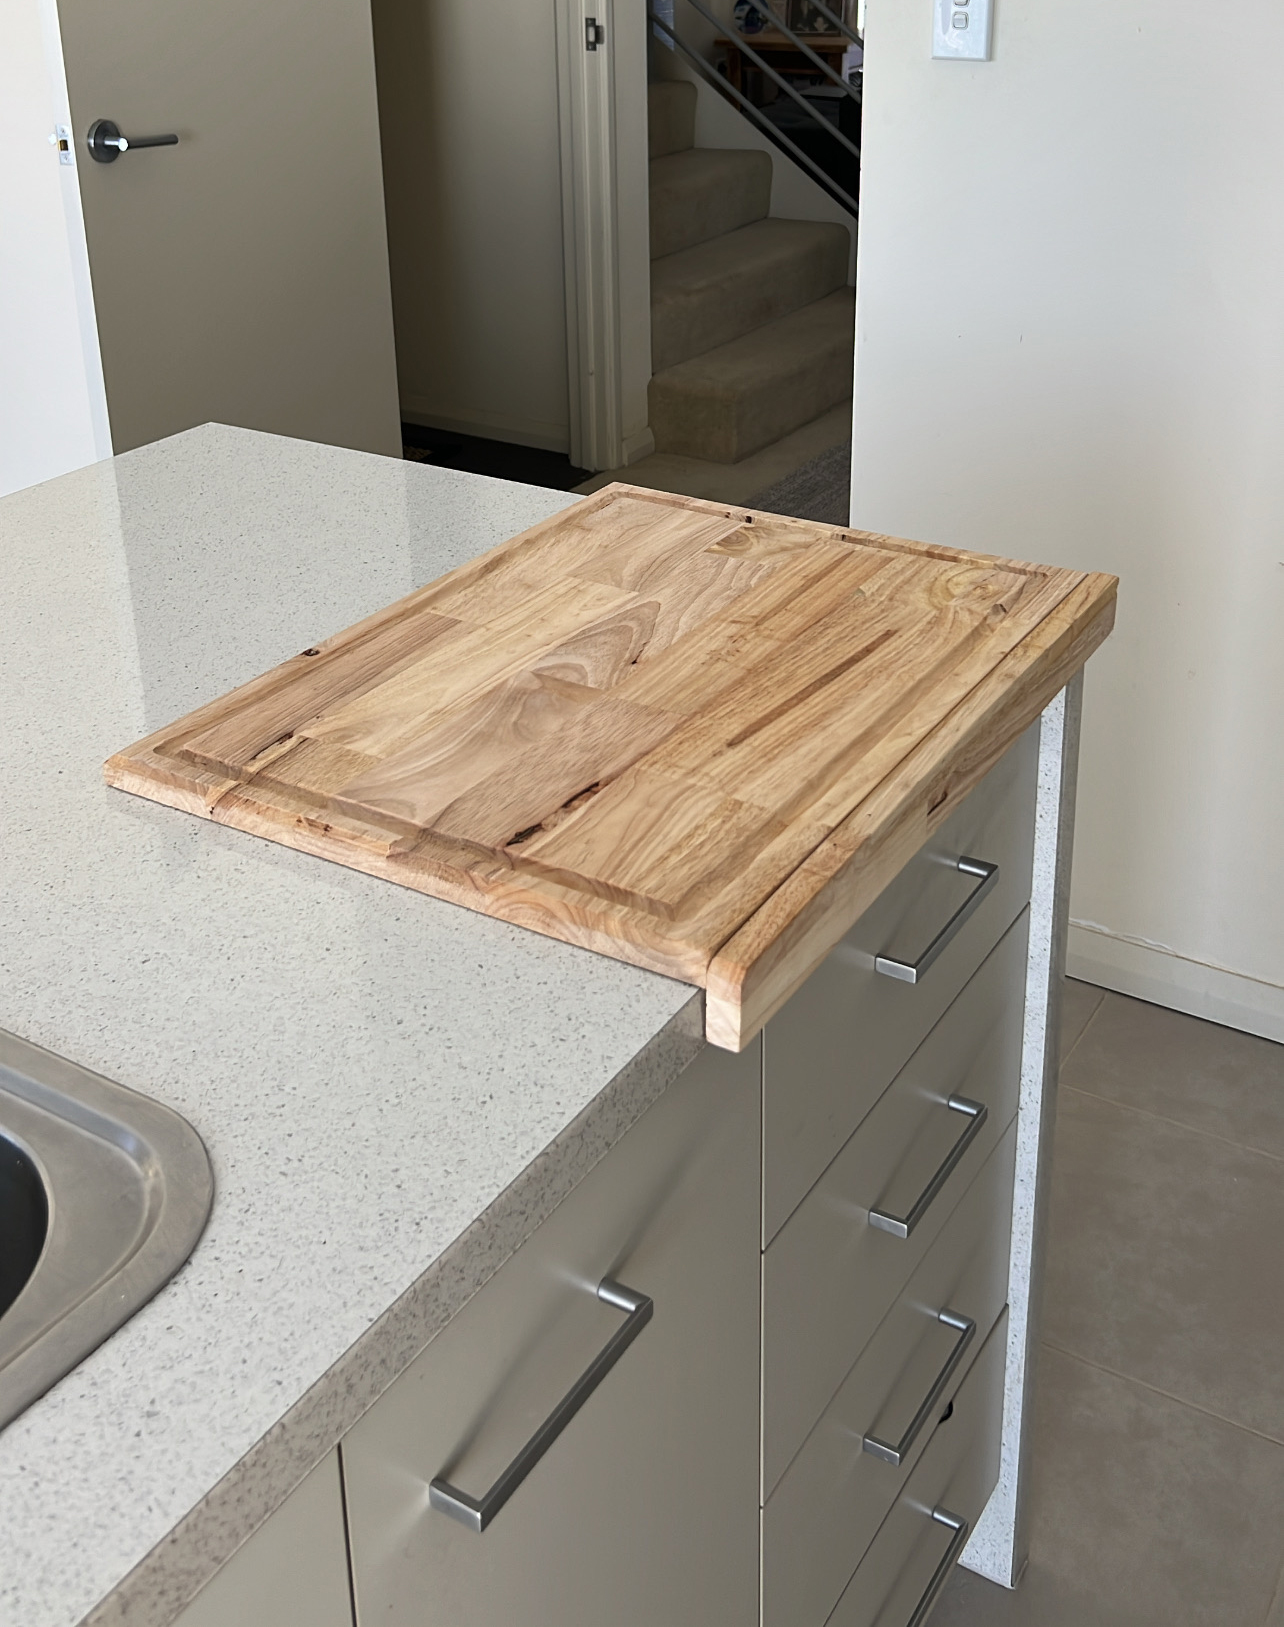
Next, insert dowels to attach the lip to the board. Use dowel centres and 8mm dowels. Drill three 8mm holes equally apart on the chopping board, insert dowel centres and line it up with the lip piece. Tap it with a rubber mallet or hammer to get an impression. Now drill three holes on the lip piece. Use some wood glue in the dowel holes, insert all 3 dowels and line up the lip piece and attach it. Clamp it into place and leave to dry for a few hours.
Once dry sand with 120 and 240 grit sandpaper and then finish off with food safe varnish.
Feeling creative but lacking ideas? We’ve got you covered! Watch our videos and follow the step-by-step instructions to unleash your creativity.
.png?w=100&itok=D7d8Umfz)

.png?w=100&itok=Lj7SSICT)

.png?w=100&itok=fnsLcLhG)


.png?w=100&itok=efvsqCNL)


.jpg?crop=yes&k=c&w=690&h=690&itok=NNvZ758s)


.png?crop=yes&k=c&w=690&h=690&itok=J5F8BAY0)
